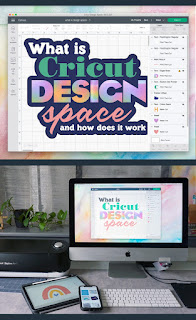
Editing Cricut SVG Files in Design Space
Here are a few tips and tricks you can use to make editing Cricut SVG files in Design Space easier.
- Scale & Flip Vertical
Have an SVG that's too small for your project? Don't fret - there's a solution!
1. Change the Colors
If you want to modify a Cricut SVG file in Design Space, there are several steps that must be taken. You will need to resize the image, delete elements from it and change colors accordingly.
To edit the color of an SVG, select one of its layers and click on the small black square. Next to 'cut', there is a small pop up box where you can choose your desired hue.
If you wish to recolor each layer independently, you will need to ungroup the file. If it has been grouped, you'll see it listed under Layers with an 'Ungrouped' designation above each one.
SVGs are ideal for Cricut because they contain directional information or paths. This enables the blade in a Cricut to read these directions and cut precisely whatever shape or design is desired.
2. Remove the Background
Many people want to use images in Cricut Design Space but don't need a background. They've found an inspiring graphic on Pinterest, Google, or another online source and would like to incorporate it into their design.
Good news! There's an easy solution for getting rid of background images from these types of pictures. Start by uploading the image into Cricut Design Space using the Upload button located on the side bar.
Uploading an image or vector file from the internet usually opens a window asking you to browse for it. If downloaded from somewhere, it should be in your downloads folder on PC/Mac (even screenshots work!).
Click upload and add this image to your project. Give the image a name and some tags so you can easily locate it again later.
3. Change the Size
If your Cricut SVG file is too large, you can adjust its size in Design Space by selecting the image and using the X and Y boxes to resize.
This will resize the image to fit within the size of your Cricut machine's cutting blade while maintaining the resolution of the image.
You can also use a free online tool to convert your images into SVGs compatible with your Cricut. However, these services have varying degrees of success.
You can upload your SVG files directly into Cricut Design Space if you need to make modifications. This is a great option as it saves you time and stress.
4. Change the Text
Sometimes an SVG image that you need to cut may have some issues or require minor editing. Fortunately, there are numerous methods available in Design Space to fix or enhance SVG files.
One way to customize the text in an SVG file is by using the Offset tool. This handy feature enables you to create a proportional outline around all of your elements--text, images and shapes included!
If you want to give your design a unique flair, sending backward or flipping horizontally is an excellent choice. Additionally, these options can help ensure that all elements in the design are balanced.
Another way to customize the text in your SVG image is by using Fonts. You can select from Cricut's library of fonts or use system fonts already installed on your computer or iOS device.


No comments:
Post a Comment